Gel Printng 101 Guide

Gel Plate Printing:
Beginner’s Guide to Getting Started
Gel plate printing is a printmaking technique that’s easy to learn and complements many other mediums and creative projects. Using a gel plate (a squishy, soft silicone line plate), you can transfer beautiful textures, colors, and patterns (even images!) to paper and fabric– just to name a few!
Whether you’re a beginner or an experienced artist, gel plate printing opens a new door to adding it to an existing practice, such as collaging or junk journaling, or learning the depths of gel plate printing to create your mixed-media masterpieces. This beginner's guide to gel plate printing will take you through the essentials, from what gel plate printing is to the tools you need and basic techniques to get started.
What you’ll learn in this guide (Click below to go directly to each section):
Gel Printing Basics
Gel plate printing is a form of monoprinting, meaning each print you create is a unique piece. It involves using a gel plate, which is a soft, squishy plate made of gelatin-like material, to transfer your paint onto your chosen surface, such as paper.
The basic concept of gel plate printing is simple. You apply paint onto the gel plate and use a brayer and/or a brush to distribute the paint. Then, you press the paper onto the plate to transfer the design. You can lift the print after just a few seconds, or you can add more layers for even more color layers to change your outcome.
The beauty of gel plate printing is it's experimental. It’s not about perfection, but about exploration and experimentation. Each print can be unique, with the colors and textures mixing in unexpected ways. However, with some techniques (we will talk more about that soon), you can manipulate your outcomes to achieve certain effects.

Tools for
Gel Plate Printing
Getting started with gel plate printing requires only a few essential tools. If you’re artsy, crafty, or any combination of the two– you likely already have many of these items in your stash.
Gel Plate
This is your main tool—a soft, squishy plate that holds the paint. Gel plates come in different sizes, from small 3x5 inches to large 8x10 inches, depending on your project. There are several brands out there to choose from, but in my experience, the Gelli Arts and Gel Press brands are the best, and can easily be found at your local craft store.
Acrylic Paint
The most common medium used for gel plate printing is acrylic paint (certainly not the only medium though). Acrylic paints are vibrant, dry quickly, come in various colors, and can be mixed to create custom colors. I like using student-grade acrylic paint, such as the Liquitex Essentials line because they are not as opaque as some other higher-end acrylic paints. This allows you to layer colors to create more dimension in your finished product.
Brayer (Roller)
This handy tool is used to roll out a thin, even layer of paint on the gel plate. Brayers come in different sizes. I typically recommend using a brayer that is slightly bigger than your gel plate to help evenly distribute paint with minimal streaks. I also like to use a harder brayer for gel plate printing, but that is just my preference.
Paper
Paper is a topic on its own, so I’m going to keep this simple. You want to pick a sturdy paper, such as 30-60 gsm paper weight. I like to use the Strathmore Printmaking paper or Strathmore Bristol paper when I’m feeling fancy. However, as a beginner focus on play and practice. Grab whatever cheap paper you have such as upcycled paper, copy paper, cardstock, or even construction paper.
Tools to Create Texture
There are so many things that can be used to print. Seriously, SO MANY THINGS! To get started, dig in your current art stash for stencils, textured materials such as bubble wrap, lace, mesh, cotton swabs, and anything that can leave a mark on your gel plate. Even florals, leaves, and vegetable scraps can be used for printing. The only thing to stay away from is anything sharp that can puncture the gel plate.
Pape Towels, Rags, and wipes
Gel plates can easily be cleaned and wiped down with water and a paper towel or rag. These can also be used to clean your brayer, but if you need a deeper clean, baby wipes also come in handy.
Basic Techniques for Gel Plate Printing
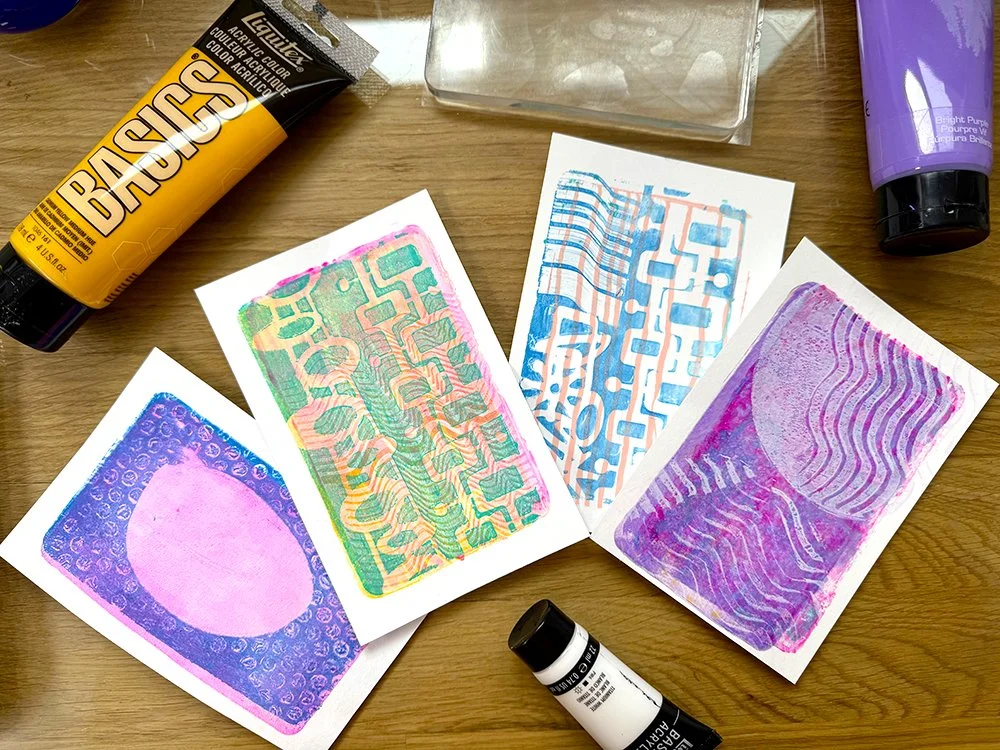
Gel plate printing is all about playing with layers, textures, and colors. Below are some basic techniques to get you started. Once you get the hang of them, feel free to experiment and mix things up!
Basic Monoprinting
This is the most straightforward technique. Simply apply a layer of acrylic paint onto the gel plate using the brayer. Roll it out to an even coat and place your paper on top, then using the palm of your hand in a firm and circular motion transfer the paint to your plate. You can apply more layers of paint to create more textures or colors.
Tip: Acrylic paint is builable and recommended that you work in think layers. If you want a lighter print, use less paint. If you want bolder, more vibrant prints, layer on more paint!
Texture and Stencil Printing
To add texture to your prints, use objects with interesting surfaces (remember, nothing sharp!). Place things like bubble wrap or a flower on the gel plate before applying paint. Press gently into the plate to create textured imprints (by pressing them and removing paint, you are creating negative space that can then be filled in a future layer). After that, apply your paper as usual to capture the texture in your print.
Layering Prints
One of the most exciting parts of gel plate printing is layering! You can add layers of paint one at a time to create depth in your print. For example, after your first layer has dried or been removed from the gel plate, apply a second layer of paint or ink, and press down your surface again.
Tip: Layering requires an understanding of positive and negative space so that you can see the layers and print more onto your paper. At its core, your positive space is the area with paint and your negative space is the “blank” parts of your plate that will either appear as blank on our paper or the color of the previous layer. I know this can be confusing, so here is a good resource for understanding negative and positive space. There are a few photos below that can also be helpful.
Reverse Printing
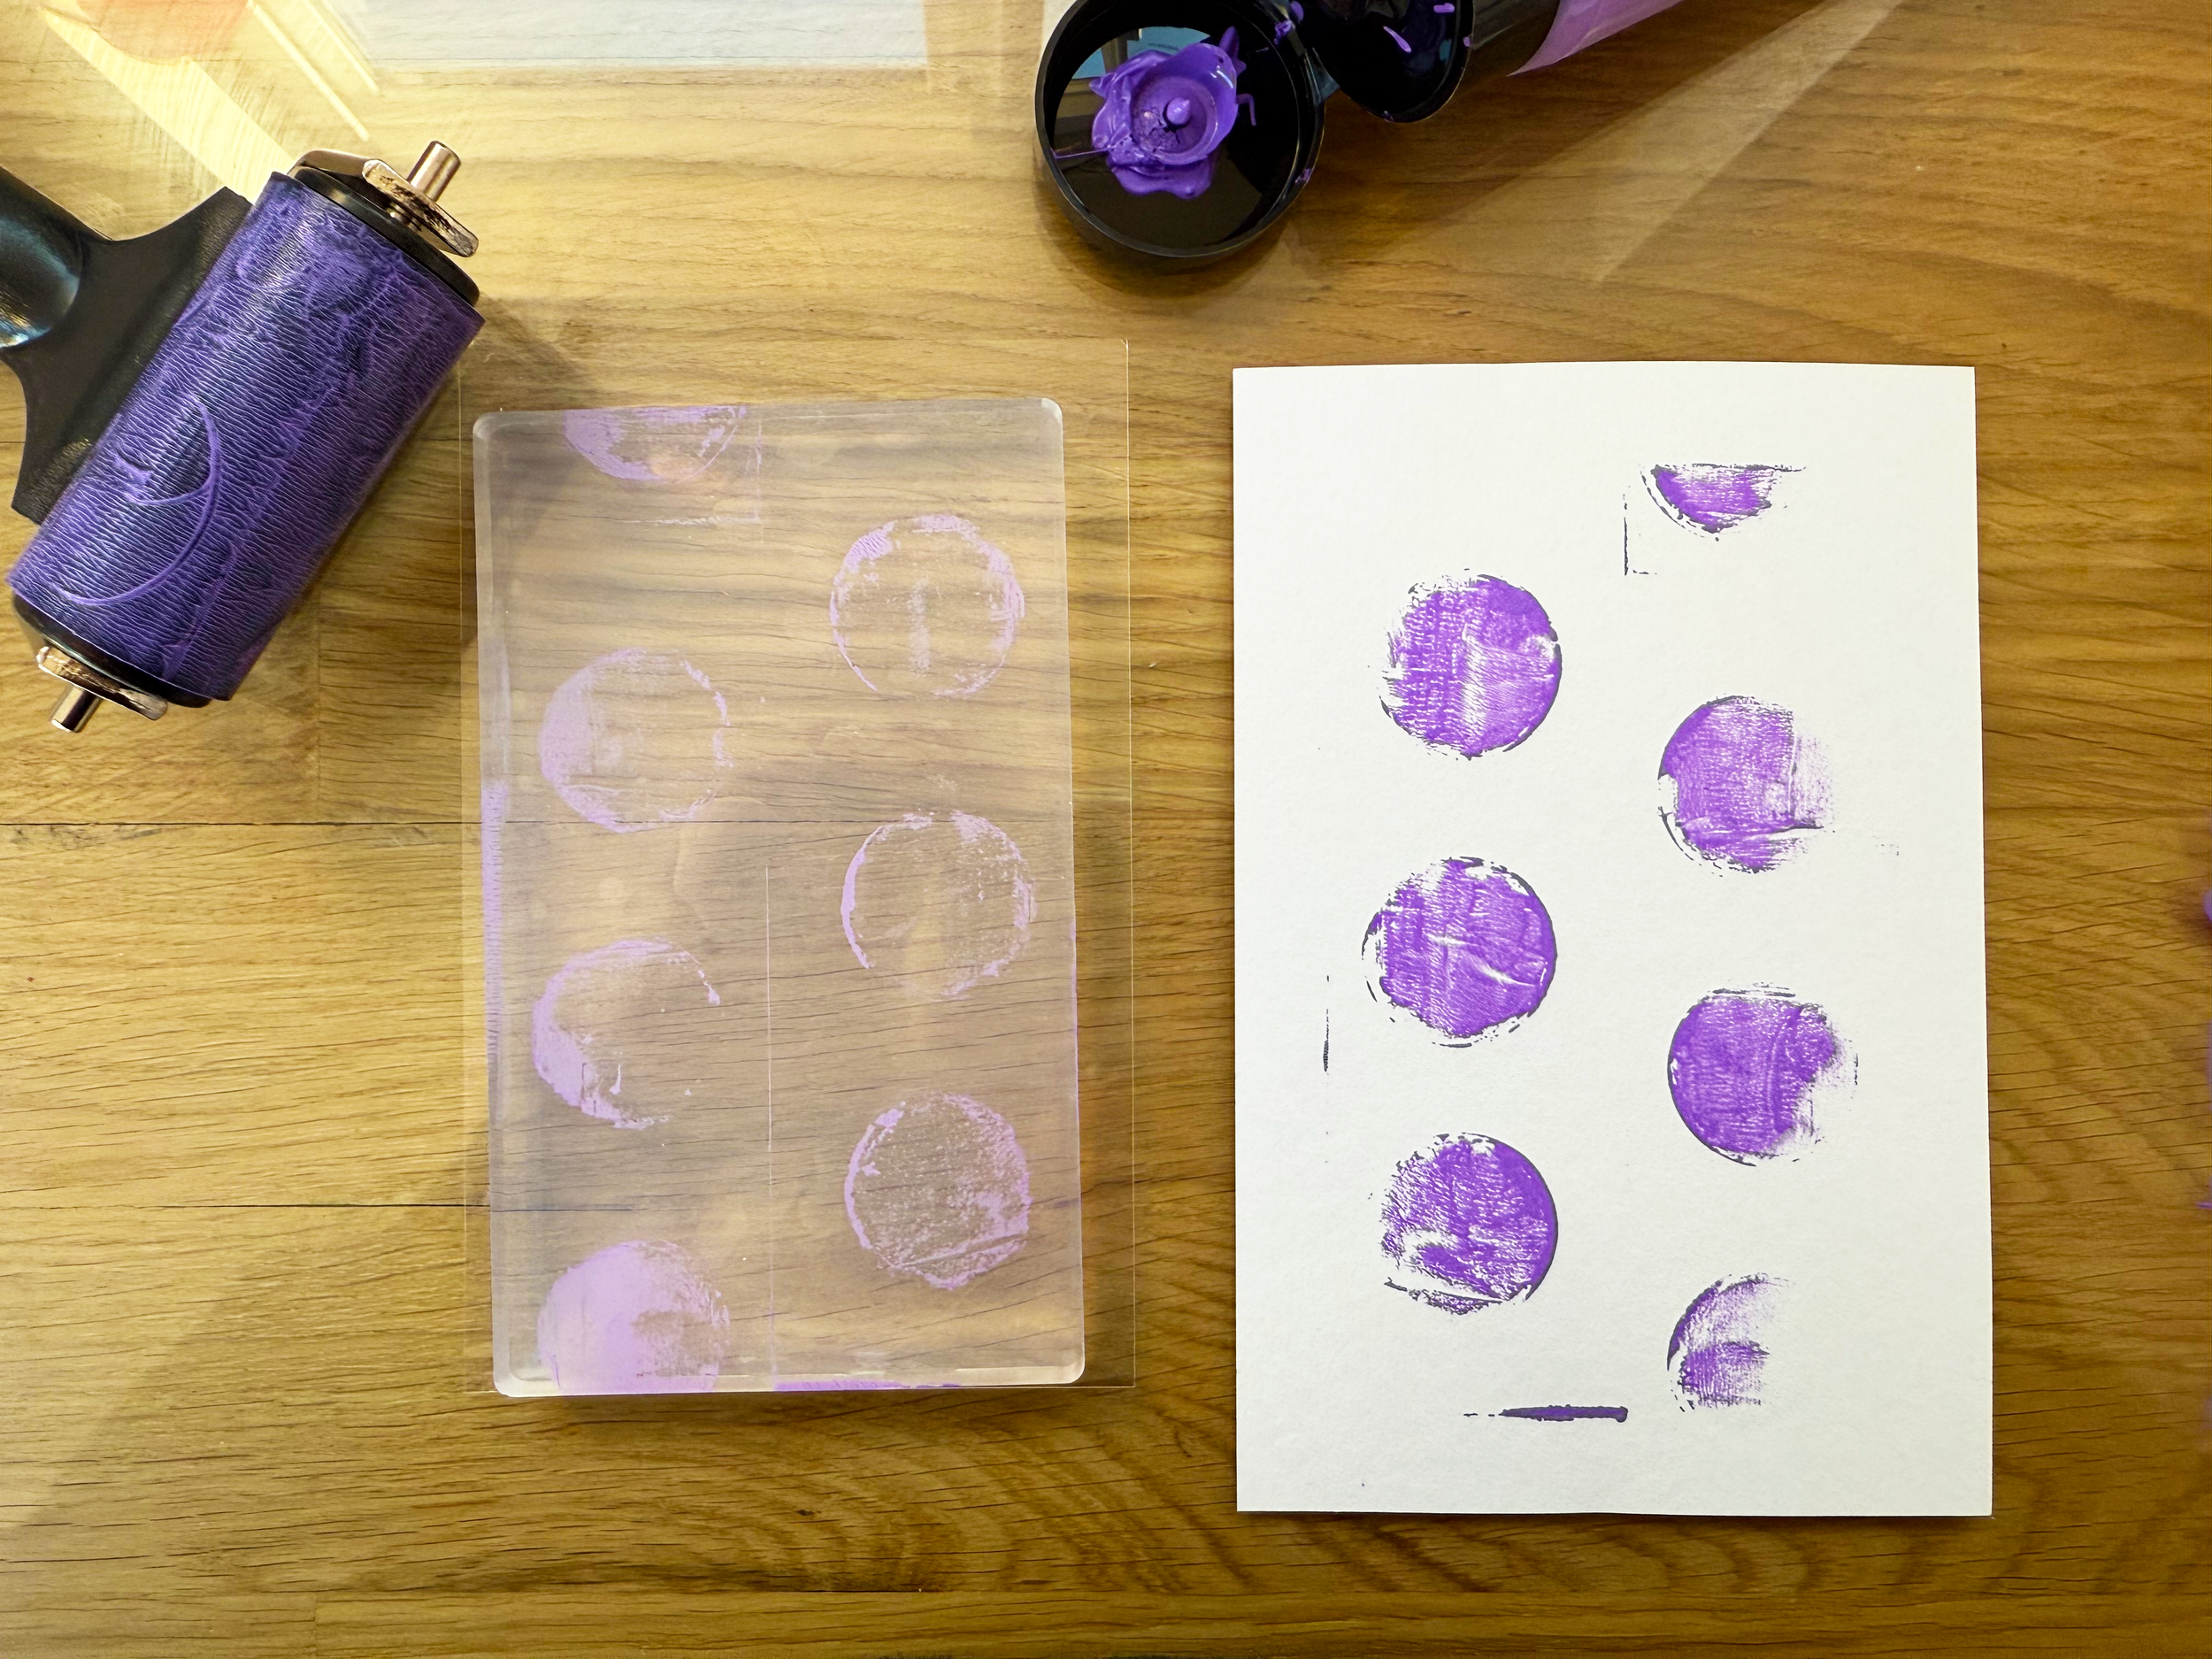
Expanding on the concept of positive and negative space, reverse printing is a technique where you block out parts of the gel plate to leave negative space. Use a mask or stencil to cover certain areas of the gel plate before rolling on your paint. Once you remove the mask, those areas will remain unpainted, creating a reversed pattern.
Ghost Prints
Once you've made your first print, don’t let that gel plate go to waste! You can create a second (and even third) print from the same plate. The second print will be a lighter, more subtle version of the first, but sometimes this “ghost print” can be just as stunning as the original.
Creating Color Gradients
For smooth gradients, apply a bit of color theory to mix colors in an ombre effect. The key is to blend at least two colors with a brayer to create a seamless transition. For example, a light green next to a dark green. Press your paper onto the plate to capture the ombre effect.
Tip: Work quickly, as acrylics dry fast. Have your colors and placement planned ahead of time before you start rolling.
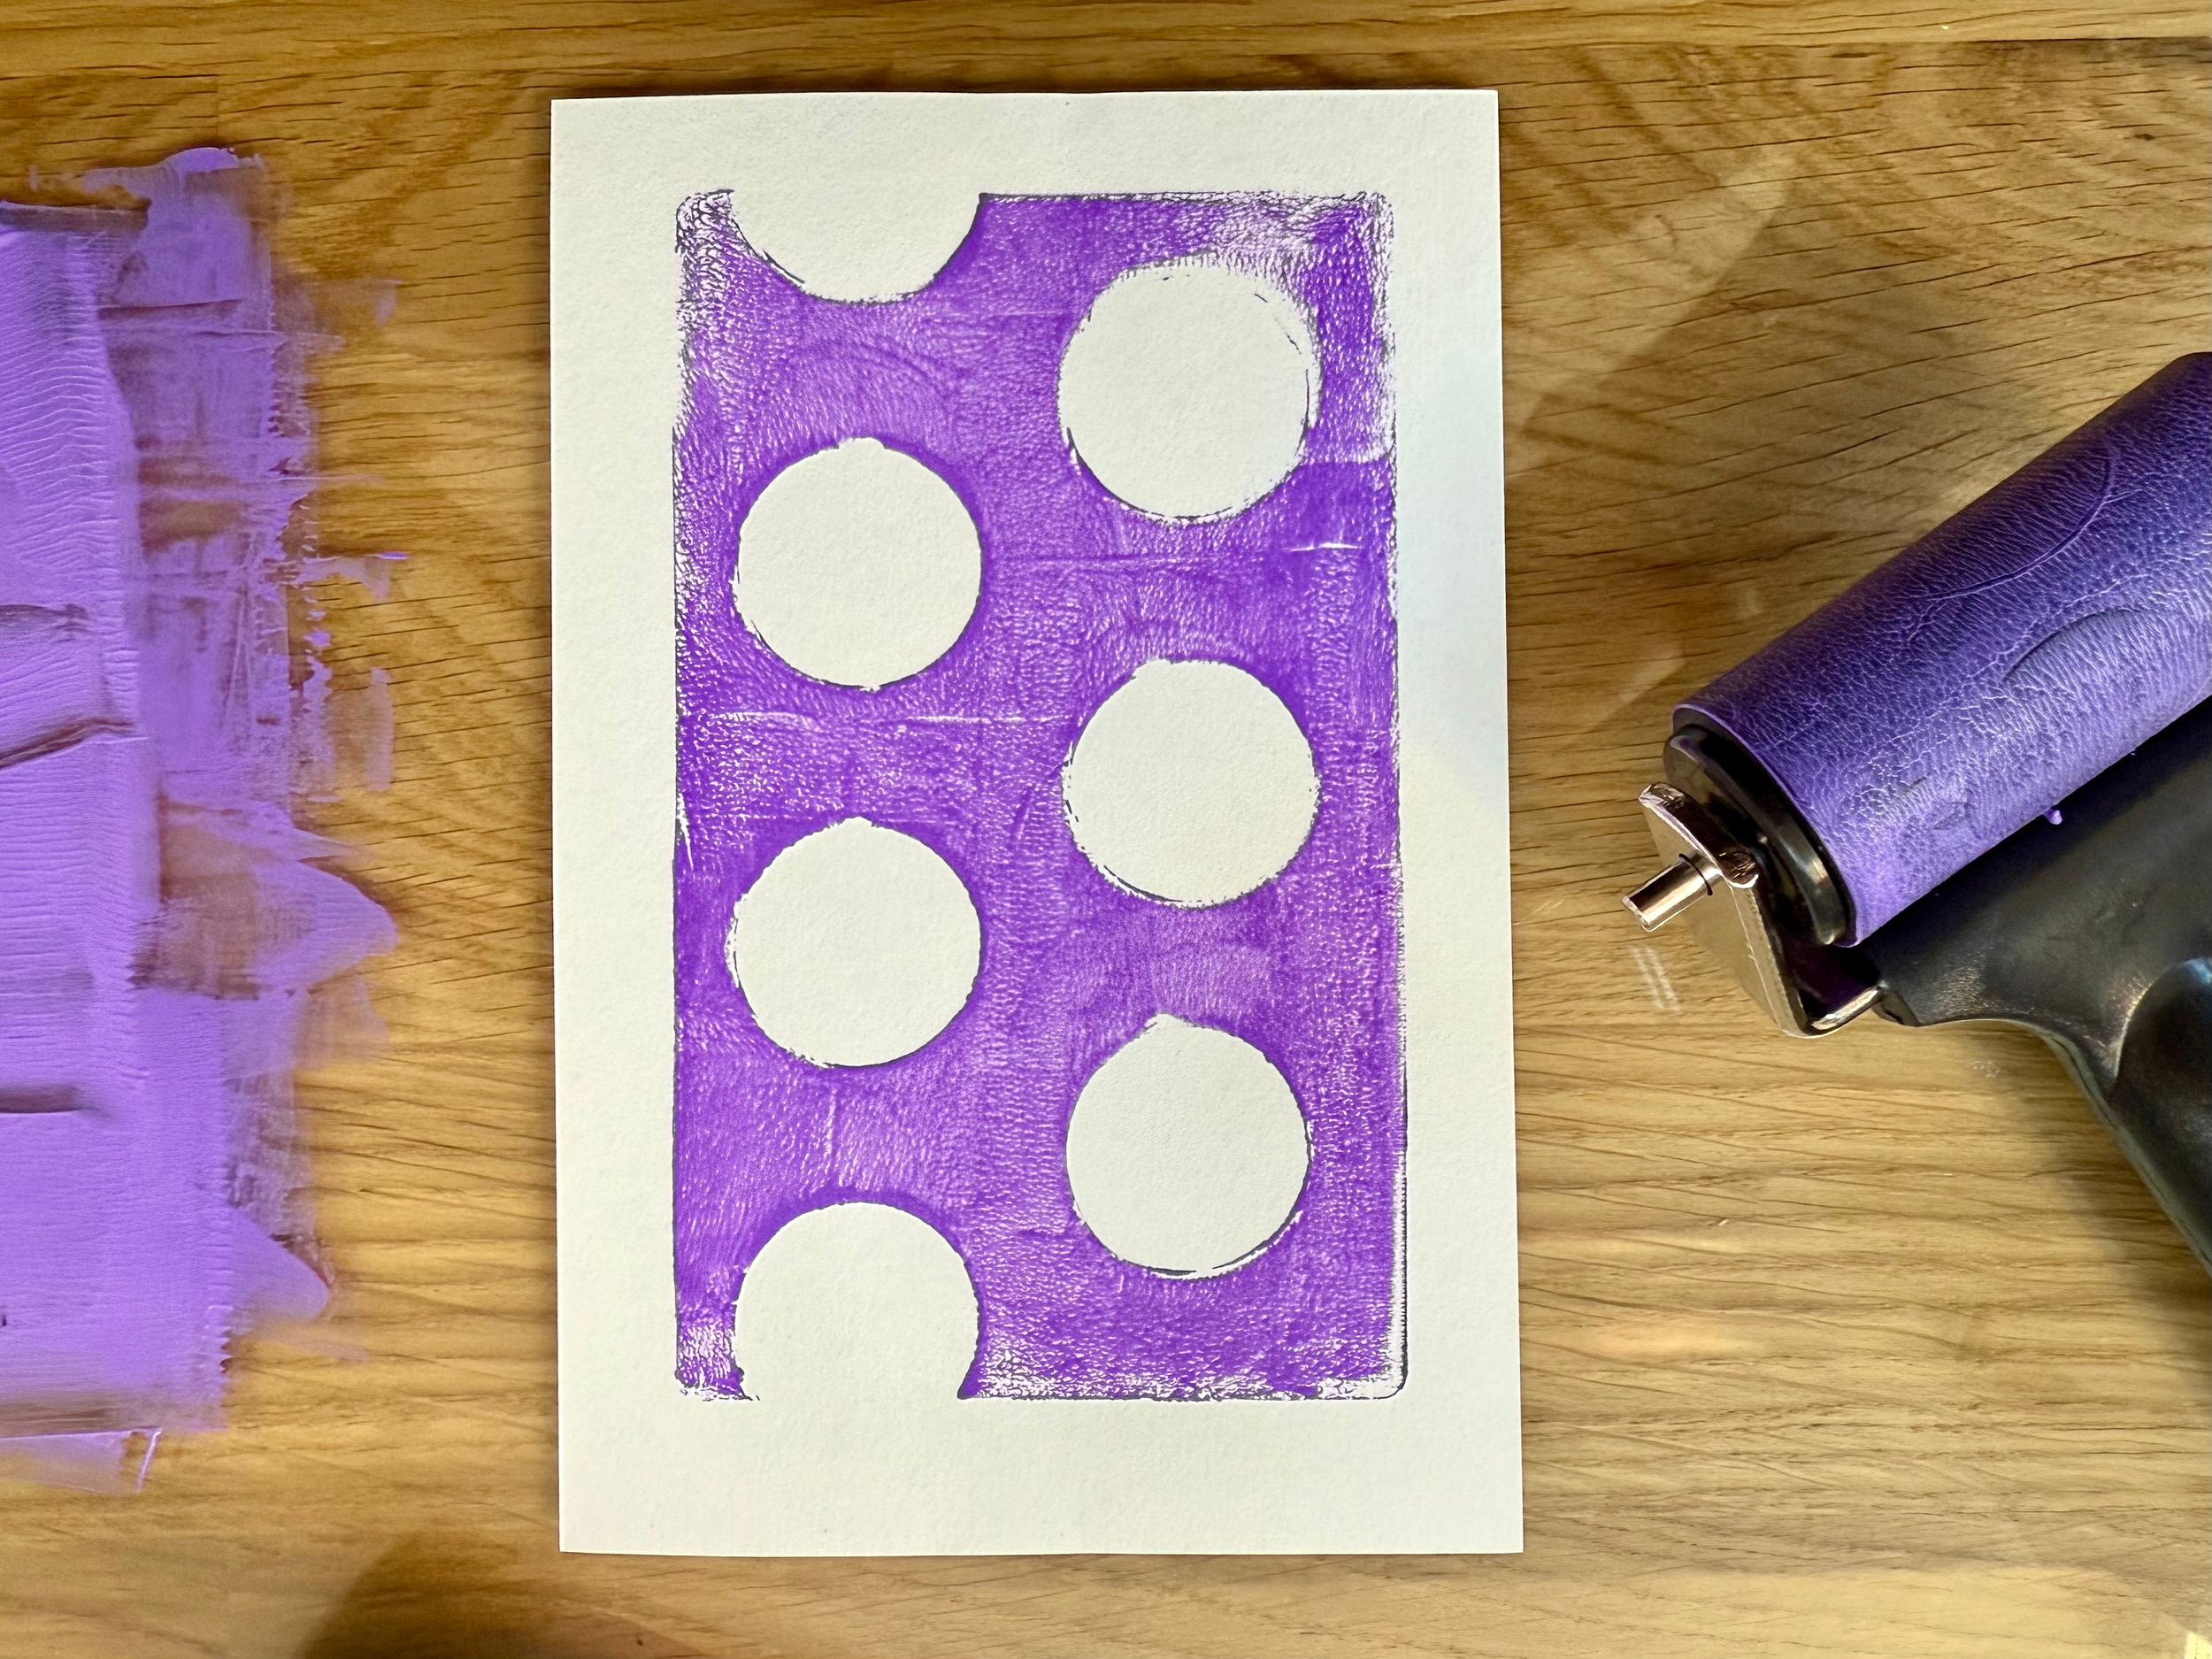
Postive Space (Purple area)
Negative Space (White area)
Final Thoughts
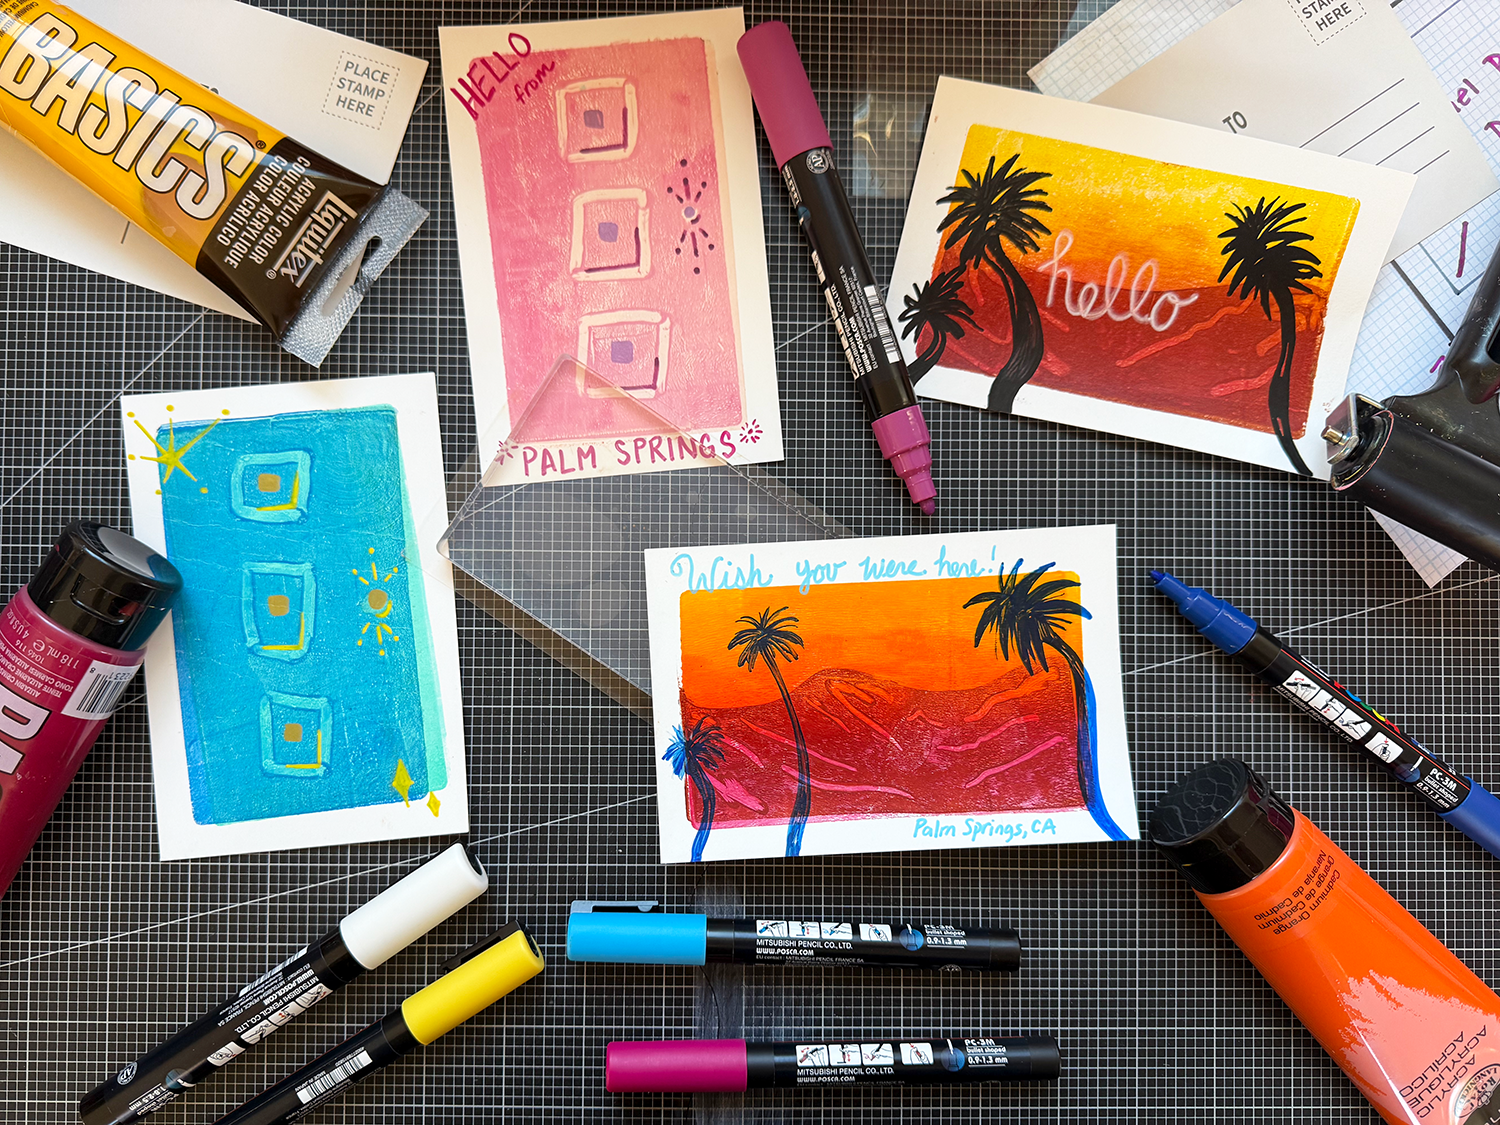
Gel plate printing is a wonderfully satisfying way to get creative with colors and textures. The key is to experiment and embrace the unpredictability of the process. With just a few tools and a lot of imagination, you can create prints that are not only fun to make but also visually stunning.
Whether you're making postcards to send friends, adding some color to your journal, or just experimenting with color and texture, gel plate printing will keep your artistic spirit flowing. So gather your tools, roll out that brayer, and let the prints begin!
Helpful Resources
10 Gel Printing Basics
If you’ve read my guide and are still craving more, her are 10 Gel Printing Basic from Gel Press to help you get to the next step in your gel printing journey as a beginner.
More Printing Basics
Gelli Arts not only has good gel plates but also tons of free resources to learn more about gel plate printing, like their guide to printing basics. They also do monthly challenges if you are looking for community and ways to grow.
Transfer Images to Gel Plates
Nadezda Borisevich is a super-talented printmaker who has videos on creative ways to gel print. She also has YouTube videos and added resources worth checking out, especially her video on how to transfer images using a gel plate.